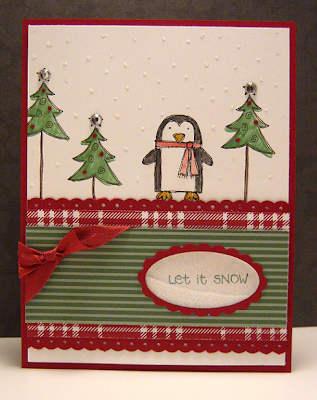
Friday, December 30, 2011

Sparkle, sparkle, sparkle!

Well, what a whirlwind holiday! My mom and step-dad were visiting from Prince Edward Island, and we had plans with one branch of the family tree from the 23rd until yesterday. But it was great - I love the holidays for that.

And now, though we can barely believe it, 2011 is rolling to an end, and we have hopes and dreams for 2012. I read something in a magazine the other day that really resonated with me; rather than making a New Year's resolution (that you're bound to break!), try and think about the things you are currently doing that you don't want to change, and make an effort through the coming year to keep those things as they are.

I've got a really long list so far of all the things I want to stay the same, but I'll come back on January 1st and let you know what they are ;)

In the meantime, to help ring in the new year, Friday Mashup challenge this week is one that will get you thinking about bubbly and the stroke of midnight!
  1. Make a project that "Sparkles".
  2. Or Make a project "Celebrating the New Year".
  3. Or "Mash it Up" and create a project "Celebrating the New Year that Sparkles" .
I adore sparkles, so I was thrilled to pack as many into this card as possible ;)  I'm not sure that you can make out all the sparkle from the picture, but that firework is exploding with it! haha. My craft room was a mess!

As an added bonus, this card features a little sneak peek into one of the stamp sets from Sale-a-bration, which is starting soon!


 Celebrate

For this card, I wanted to keep it simple and sparkly!
1. Let the sparkle shine!: Fireworks aren't fireworks without sparkles! After I glued all those dots down (and yes, it took some time), I ran over them with a 2-way gluepen and then just covered the card with glitter. Since there was so much glitter, I thought it would be a good idea to contain some of it. I used a clear window sheet and some mini brands to make a window for the firework.

2. One layer!: To keep this card simple, I stamped the quite 'fancy' sentiment directly onto the card base. I resisted the urge to colour it in, and (barely) resisted the urge to add glitter to that too ;) I wanted the focal point to be the firework.


The supplies I used for this card were:

Cardstock: Pear Pizzaz, Peach Parfait, Basic Gray, Whisper White
Stamps: ...You'll see soon enough ;)
Ink: Basic Gray
Embellishments: Dazzling Diamonds Glitter, Silver mini brads, window sheets
Tools: Dotted Scallop Border punch, 2-way Gluepen
Hope you enjoyed your visit, and we'll see you soon :)
Until next time - Happy Stamping :)
-Tara

Friday, December 23, 2011

Merry Christmas!

Well, this is it... the last 'workday' before Christmas. I gotta say, up until last night, it wasn't feeling 'Christmas-y'. Then my mom arrived from across the country, and BAM, the magic began :D

Today at the Friday Mashup, the design team has this wicked sketch challenge for you. And if you dare, you can mash it up and use the sketch with some watercolouring.


So here is the "Mashup" Challenge :
  1. Make a project using the "Sketch".
  2. Or Make a project using "Watercoloring".
  3. Or "Mash it Up" and create a project using the "Sketch & Watercoloring" .

Hello

I have to admit, I'm not the best at watercolour. I did try, but I'm not sure that I even did enough to claim that I watercoloured ;) Around the tree, bird and clouds there is a tiny bit of colouring, that may be hard to see. I also flipped the sketch on it's side!

I hope everyone has a very safe and happy holiday! And hopefully we'll see you back before next Friday! I can't believe I didn't update all week.

My mom, sister-in-law and I are planning a card afternoon, where we just get together and make some things, so I'll be back before too long with all the excitement of that :)

Until next time - Happy stamping! :)

-Tara

Friday, December 16, 2011

Chip off the old block!


As I write this, I’m running a fever and have so much pressure behind my eyes and ears that I feel like that frog from Shrek – you know, the one that Shrek blows into and makes a balloon for Fiona?

Anyways, this is going to be a super short one today, but I just had to come and share this fun Friday Mashup with you:
  1. Make a project featuring "Chipboard (Precut or Diecut )".
  2. Or Make a project with "Distressing ( ink, scissors or the Cutter Tool Kit)".
  3. Or "Mash it Up" and create a "Distressed Project featuring Chipboard"

 Since I love distressing oh so much, I was thrilled about this one!


Sympathy

I realize you can barely see the stamp/sentiment, but that was partially intentionally – It’s a sympathy card and I wanted it to be subtle. The other reason is that I didn’t realize it was going to come out that light ;)

Going back to bed now – enjoy the Friday Mashup challenge, everyone!

Until next time – happy stamping :)
-Tara

Tuesday, December 13, 2011

I've always wanted to be a princess!

I was a "Perfect Princess" at the Freshly Made Sketch challenge #14


Thank you to the FMS team and Tui, for selecting my card :)

-Tara

Sunday, December 11, 2011

My Crafty World pick


How fun! Tiffany Bauer over at My Crafty World has selected one of my cards for her "My Crafty Picks" collections! Thank you, Tiffany :)


Why don't you head on over there to check out some of the other fantastic projects she picked? It's OK, I'll wait here! While you're there, don't forget to take a long look at her projects too {pssst... Check out the "Jingle All the Way" shadow box. Isn't that awesome?}.

This is the card that was selected.


Thanks for stopping by this morning.

Until next time, happy stamping :)

-Tara

Friday, December 9, 2011

Baby, it's cold outside!

Hello!

It's Friday Mashup day! :) How happy does that make you?! It makes me pretty happy. This week, the Friday Mashup challenge was to:
  1. Make a project featuring "Snowmen".
  2. Or Make a project using the colors "Blushing Bride, Baja Breeze & Basic Grey".
  3. Or "Mash it Up" and create a "Snowman project with the colors Blushing Bride, Baja Breeze & Basic Grey".
Believe it or not, I don't actually own any snowman stamps! I had borrowed "Punch Pals" from a friend of mine, but I just returned it to her last weekend. I do, however, have the oh-so-pretty Winter Post set, and it seemed to fit perfectly with the colour this week. I just love those skaters.


Christmas Postcard
 (FM36)

For this card, I wanted to add a little extra!
1. Get out your glitter!: I didn't want to overdo this card. I wanted to keep it pretty clean looking, and simple. I did, however, want to add a little extra, so I frosted off the hat and cuffs of lil' miss with some Dazzling Diamonds.

2. Stamp off!:Add a faint background image to your cards with the 'stamping off' technique. The snowflake in the background of my card were inked up in Baja Breeze, and then stamped on a scrap piece of paper (twice!) and then stamped onto my card. It gives you a faint background, and the colours still coordinate perfectly!


The supplies I used for this card were:

Cardstock: Basic Gray, Baja Breeze, Blushing Bride, Whisper White
Stamps: Winter Post
Ink: Basic Black, Baja Breeze, Blushing Bride
Embellishments: Dazzling Diamonds Glitter
Thanks for stopping by today!

Until next time - Happy Stamping :)

-Tara

Thursday, December 8, 2011

A new challenge!

Hello!

Today's card is brought to you by the number 14, and the letters F, M and S... And by that I mean, I participated in the Freshly Made Sketch challenge #14 today. I've been seeing the sketches around all over the place these days, and keep thinking how absolutely lovely they are. Figured it was time to jump on the bandwagon ;)

"Clean". It's almost impossible to stay that way when you have a 3 year old and a 3 month old... So if my house, clothes and children can't be clean, at least my cards can be. And Freshly Made Sketches is all about clean. How refreshing!

As soon as I saw this sketch, I instantly thought of a present all wrapped up... So, I dressed up this card to look like a present. This isn't one of those cards you pop in the mail though, so I made this one to give to my dad at Christmas when I see him. We don't exchange gifts, so when he opens this "present" card, he'll see a little picture of his grandsons (well, the grandsons that I grew, at least!)

Merry
 
(FMS14)

For this card, I wanted to keep it clean!
1. Resist the urge to distress!: Let me be frank here; I have a not-so-secret love affair with sponging. I do it all the time. Almost too much (is there such thing?!). But don't be afraid of the clean lines! Nice, 'clean' edges can keep your card looking fresh and crisp. Back away from the sponges!

2. Embellish with "big"!: "Clean" doesn't have to mean embellishment-free! have at it, go crazy :) The reason for the big bow was threefold! 1) I was sticking with the philosophy "go big, or go home"; 2) When it comes to presents, the bigger the bow, the more likely it'll get opened first! hehe; and 3) With less surface area, I was less likely to cave to the gentle whispers of the sponge (see above).

The supplies I used for this card were:

Cardstock: Cherry Cobbler, Marina Mist
Paper: Frostwood Lodge DSP
Stamps: Tiny Tags 
Ink: Cherry Cobbler
Embellishments: White Satin ribbon
Tools: Jewelry tag punch.

Until next time - Happy Stamping :)
-Tara

Wednesday, December 7, 2011

Family Portrait

Happy Wednesday, everybody!

Let me start this post by saying that we're not 'picture people' in this house. Ok, maybe it's just me that's not a picture person, but I digress. This year for Christmas, instead of having a family photo done (which we will eventually do, I'm sure), I used the All in the Family stamp set and stamped out a little Bourgoin family portrait :)

In making this card, I quickly realized that the Marvelous Markers set would have been a fantastic addition to my craft room. Yes, I stamped each person a couple times on various papers/cardstocks and cut them all out. No colouring for me! It was a tad labour intensive, but I couldn't stop laughing the whole time. This set sure makes me smile.

The awesome colours came courtesy of the ColourQ challenge this week: I modified only slightly to replace Cool Caribbean with Tempting Turquoise.


 Merry Christmas from our family
 (CQC114)

For this card, I wanted to keep it fun!
1. Don't take yourself too seriously!: It's almost impossible to keep a card "serious" when using the All in the Family set! It's so jovial and light-hearted! Every now and then, you have to make a card that just makes you smile with its silliness. Even though I don't necessarily think this card is silly, it's not your typical Christmas card, that's for sure!

2. Try paper-piecing!: Yes, it can be time consuming - but the results are certainly worth it! Granted, with the attention to detail that Stampin' Up! has already done, and the fact that they have markers in all the ink colours, you may wonder why you would ever want to paper-piece. Sometimes, it's worth it! It gives your card some added dimension, and the colours are solid. OR, try piecing with some patterned paper - look at "my" dress - that's a piece of Tempting Turquoise designer series paper! And what about those lights, you ask? Those are leftovers from the Triple Layer Doily punch! Save your scraps, you never know when they'll come in handy :)

The supplies I used for this card were:

Cardstock: Certainly Celery, Poppy Parade, Crumb Cake, Whisper White, Tempting Turquoise
Paper: Temping Turquoise DSP
Stamps: All in the Family, Petite Pairs
Ink: Basic Black
Embellishments: Rhinestones 
Tools: Paper Snips (big time!!), 2-way Gluepen
Until next time - Happy Stamping :)
-Tara

Friday, December 2, 2011

Shake it up!!


I have some very exciting news to share this morning! I have the honour and privilege of being a guest designer for the month of December over at The Friday Mashup!

I've enjoyed participating in their challenges so much, and because of their challenges have tried my hand at so many news techniques - This week is certainly one of them, where we were challenged to make a shaker card! Something that I have been meaning to do for quite some time but never had the nerve to try.
  1. Make a project featuring "A Shaker Card".
  2. Or Make a project with a "Winter Theme".
  3. Or "Mash it Up" and create a " Winter Themed Shaker Card. "

Well, here it is, folks! And let me tell you, it was so much fun. If you've been meaning to try a shaker card, I urge you to take the plunge :)


Let it Snow

For this card, I wanted to jump way outside my comfort zone!
1. Don't be afraid to try something new!: When it comes down to it, everything was new once - walking, talking, counting, eating broccoli!... but we take on the challenge without a second thought. Take this approach when you're making your next card. You'd be surprised at what you can accomplish and you'll have a renewed faith in your own creativity!

2. Embrace your mistakes!: Ok, I admit it, I made a mistake. And given the type of mistake it was, correcting it would mean redoing a large portion of the card! Did you notice that the sentiment isn't completely centred? Well, I noticed, and I let it go! Turns out, it worked out great - it gives the 'snow' inside the shaker portion a spot to build up, giving it the feel of rolling hills (or a snowdrift!) :) Embrace your mistakes - It gives you a chance to learn.
 
The supplies I used for this card were:
Cardstock: Cherry Cobbler, Whisper White
Paper: Frostwood Lodge DSP, Garden Green DSP
Stamps: Punch Pals
Ink: Garden Green, More Mustard, Basic Black, Chocolate Chip, Cherry Cobbler
Embellishments: Cherry Cobbler Seam Binding ribbon, Dazzling Diamonds Glitter, Rhinestones
Tools: Large Oval punch, Scallop oval punch, Dotted Scallop Border punch,

Until next time - Happy Stamping :)
-Tara

Wednesday, November 30, 2011

Fun Night!

Hands down, my favourite part of being a Stampin' Up! demonstrator is being able to hang out with a great group of ladies and make some cards :) Last night, I had a few close friends and family come over and we made some 'last minute' Christmas cards. It's funny, it's not even December yet, and I think that making cards on November 29th is last minute!

I wanted to share one of the projects from last night, because I think it's just too cute! How are your Christmas cards coming along? :)

Merry Christmas and a Happy New  Year

punch, stamp, sponge, done! :)

The supplies I used for this card were:
Cardstock: Pool Party, Whisper White
Paper: Not Quite Navy DSP
Stamps: Punch Pals, Delightful Dozen
Ink: Not Quite Navy, Pool Party
Tools: Postage stamp punch
Until next time - Happy Stamping!!

-Tara

Sunday, November 27, 2011

Sugar and Spice!

This week at the Friday Mashup we were challenged with using a very yummy colour palette: aqua, chocolate and white! And, if we so dared, mash that up with a Christmas theme. I decided to take a break from Christmas with this challenge, and used the awesome colour combination to make a clean and simple birthday card using one of my favourite stamps: the Triple Treat Flower.
I love those bold lines, and how about all the coordinating punches?! Use the Fancy Flower, 5-Petal Flower, or circle punch to separate the layers and mix up colours!
Happy Birthday Wishes
(FM34)
For this card, I wanted to keep it simple!
1. Embrace the white space!: The white space in a card (or, the space without patterns/images), can be as striking as the focal point! It helps keep the card looking clean, and can really draw attention to the 'main attraction'. I resisted the urge to sponge, versamark, and slap on patterned paper... Something that's really hard for me! Stampin' Up! Designer Series Paper is so gorgeous, I usually look for every excuse to use it! Since I didn't want to use DSP in the main body of the card, I used it as an accent for the stamped image - a tiny hint of Spice Cake in the middle of  the Triple Treat Flower.

2. Be bold!: Using colours that really contrast each other help make the card pop - it gives the illusion of depth and dimension. I like to use stamp sets with very bold and heavy lines when the rest of the card is clean and simple! It gives the card some weight, like having a light and fluffy mousse cake with a nice cookie crumb crust ;)
 
The supplies I used for this card were:
Cardstock: Pool Party, Early Espresso, Whisper White
Paper: Spice Cake DSP
Stamps: Triple Treat Flower, Petite Pairs
Ink: Early Espresso
Tools: Fancy Flower punch

Until next time - Happy Stamping :)

-Tara

Friday, November 25, 2011

Let's go Regal!!

Wow, has it really been almost a week since I updated my blog?! Sick little kiddos and lots of prep going on in this house these days :) I just finished making 50 Thank You cards for my sister-in-law's friends baby shower! Anyways, back to making single cards for me!

This week over at the Play Date Cafe they have some gorgeous colours to work with - and I mean gorgeous! I love the Regals colour family - the jewel tons and rich colours are so very 'me'. I would have made a great Queen... ;) So, when I saw the palette over at the Play Date Cafe, I immediately thought of Cherry Cobbler, More Mustard and Cajun Craze (at least, that's how I interpreted them!)

I tried my hand at a new technique with this challenge as well. My mother is a quilter, and a fantastic one at that. She's made some gorgeous quilts over the years. The Bargello technique is taken from an old quilting technique, and I'm not sure why I never thought of trying it with paper instead of fabric!


For Everything you are to me
 (PDCC108)

For this card, I wanted to try a new technique!
1. Borrow from other types of crafts!: So many types of crafts can serve as inspiration - Quilting, Macrame, knitting, drawing, quilling, etc - Quilting is all about colour selection and design, which is very similar to cardmaking! Or how about those gorgeous Nordic sweaters your grandma used to knit you? ;) Or try creating an accent on your card using some inventive quilling shapes! The inspiration around us in the crafting world can be overwhelming... But in a good way! :)

2. Get your markers out!: With this colour combination, I wanted to use a More Mustard colour ribbon, but didn't have one on hand. I did, however, have a More Mustard marker! I coloured my white satin ribbon with my More Mustard marker to match my card. Maybe it turned out a little "More Gold" than "More Mustard", but that just adds to the "Regal" charm of it all! To give the feel of tassels, I frayed the ends of the ribbon a bit.
 
The supplies I used for this card were:
Cardstock: Cherry Cobbler, Whisper White
Paper: Regals DSP - More Mustard, Cherry Cobbler, Cajun Craze
Stamps: Petite Pairs
Ink: Cherry Cobbler, More Mustard marker
Embellishments: Whisper White Satin Ribbon - coloured More Mustard
Tools: Decorative Label punch
Off to find my crown and sit in my velvet chair...

Until next time - Happy Stamping! :)

-Tara

Sunday, November 20, 2011

Push your supplies to the max!

It's been a lazy Sunday in the (Murphy)Bourgoin household today (typing that reminds me that I really need to get on to changing my name official...). If someone has a little extra "get up and go" they can lend me, I'd be ever so grateful ;)


On a lazy, rainy Sunday, what would be better than creating a card or two? Think about it. I'll wait. NOTHING! Nothing is better than making a card or two - except if one of those cards is made with your three year old!

First, my entry into the Pals Paper Arts challenge. It feels like it's been forever sinced I've played along there, and I just couldn't resist their awesome, clean sketch. And thanks to the wonderful tutorial by Mary Fish, I was able to add something new to my card - a scrunched up strip of ribbon. Yummy.


Mr. & Mrs. 
(PPA120)


For this card, I wanted to push the products to the max!
1. Punch it out. Again, and again, and again!:
The 1 3/4" Scallop Punch is so versatile. You can cut it up, crumple it up, punch it up, and it still has more life! I punched out 5 scallop circles from the Bravo Burgundy DSP and layered them (3 of one side, 2 of the other) to make this flower. A little manipulating, sponging and (eek) squishing, you can create a a gorgeous 3D accent for your card. The centre of the flower is a little knot of satin ribbon!


2. Don't be afraid to PULL!:
As I mentioned, this tutorial from Mary Fish reminds us to never stop thinking about ways to get the most out of your supplies. There are so many great things you can do with ribbon, but I love this messy, yet controlled, look. Watch the video and try it on your next card - you will be so happy you did :) Use this technique with the 5/8" Satin Ribbon - any colour that matches your project!


The supplies I used for this card were:
Cardstock: River Rock, Pink Pirouette
Paper: Bravo Burgundy DSP
Stamps: Aviary, Petite Pairs
Ink: Bravo Burgundy, Pink Pirouette
Embellishments: Whisper White Satin Ribbon
Tools: Dotted Scallop Border punch, Corner Rounder

Until next time - Happy Stamping :)

-Tara

P.S. This was the fun I had with my boy :) He did such a great job and did most of the work himself. He makes a mama proud!!


For his grandma, that lives a couple provinces away. I helped him tie the bow, align the papers and stamp the baskets on the balloon. But I think he did a pretty great job!!

Saturday, November 19, 2011

Everything's coming up rosettes!!

I've been fascinated by rosettes lately, but I've yet to try my hand at them. Lucky for me, this week over at the Friday Mashup, they challenged us to make a card using these clever little flowers. Honestly, there are some things out there that really fascinate me. Knitting, for instance - can you imagine the kind of brain someone must have to look at a piece of string and two sticks and say "ya, I can totally make that into a wearable garment".


Rosettes is on my list of "who came up with this stuff?!". Glad someone did though, because they are delightful. Along with the rosette challenge, FM also challenged us to use the sketch over there at the right. Lovely, no?!


And, as if I wasn't challenged enough, I threw in a colour challenge from the ColourQ :) Crumb Cake (yum), Pear Pizzaz, Pumpkin Pie, Rich Razzleberry (double yum), and white. So, please read on to see my entry into both those challenges!


With all that inspiration at hand, I got to creating - an enjoyable (as always) 30 minutes in my little craft corner!

 Thank You
(FM33)
(CQC111)
For this card, I wanted to create something fun with a lot of colour!
1. Push the boundaries!: When I saw the colour challenge at ColourQ, I thought to myself "how am I ever going to fit Pumpkin Pie into this combination?". Turns out it was easy. Just a few splashes here and there really turned this into something special and unexpected. Participating in challenges like this is a great way to do something you wouldn't normally do, and use colour combination you wouldn't even think of!

2. Look for inspiration everywhere!: The "Have a Seat" set is one of my absolute favourites. It reminds me of my grandparents house with all their old, mismatched chairs. When I started reminiscing about their house, memories of all the things I loved started coming to the surface - one of those was their garden. Both my grandparents took care of the gardens, and they were always so beautiful. That plays a part in choosing both the patterned paper (Pocketful of Posies) and the burst of floral from around the bench.


The supplies I used for this card were:
Cardstock: Pear Pizzaz, Rich Razzleberry, Crumb Cake, Pumpkin Pie
Paper: Pocketful of Posies DSP
Stamps: Have a Seat, Short & Sweet, Tiny Tags
Ink: Crumb Cake, Rich Razzleberry
Embellishments: Whisper White Satin Ribbon
Tools: Dotted Scallop Border punch

Hope you enjoyed visiting today! I certainly enjoyed creating.

Until next time - Happy stamping! :)

-Tara

Sunday, November 13, 2011

For My Wonderful Mother

There's never a 'wrong' time to send a card to your mother to remind her she's wonderful :) I wanted to make her a clean, simple and classy looking card. I played along with the Play Date Cafe Challenge this week to make a card using black and white, and a splash of orange.


 For My Wonderful Mother
  (PDCC107)

For this card, I wanted to keep it clean an simple, with a splash of colour!
1. Layer it!: For my splash of colour, I wanted to incorporate the Calypso Coral into the Triple Treat Flower, so I first inked up the stamp in the Calypso Coral, and punched it out using the Fancy Flower punch. I think inked up the Triple Treat Flower again using Basic Black. I don't currently own the 5-Petal Flower punch, which would be perfect for this, so I cut out the smaller flower and popped it up on dimensionals! A pop of colour and depth all at once!

2. Add a watermark background!: I had a lot of 'white' space to fill (well, black in this case!), but I didn't want to put any paper or colour on it - so I inked up my Triple Treat Flower stamp with versamark and scattered it around the card front. It's subtle, but in the right light, adds a nice little touch.


The supplies I used for this card were:
Cardstock: Whisper White, Basic Black
Stamps: Triple Treat Flower, Delightful Dozen
Ink: Basic Black, Calypso Coral, Whisper White (Craft), VersaMark
Embellishments: Whisper White Satin ribbon
Tools: Fancy Flower punch


Until next time, happy stamping :)

-Tara

Saturday, November 12, 2011

Flirtatious


It's early November, and in the cardmaking world, Christmas has been in full-swing for quite some time! Sometimes though, it's nice to take a break. Thank you to the Friday Mashup! team for encouraging us all to do that ;)

Our family is going to a birthday party today for 3 women. So, this challenge couldn't have come at a better time!

1. Make a project featuring "A Girly Theme"
2. Or make a project using "Your Favourite Technique"
3. Or "Mash it Up" and create a "Girly project using your favourite technique".

I mashed it up this week with a little Rock'n'Roll flirtation ;)

Happy Birthday
(FM32)


For this card, I wanted to make it as girly as possible as well as incorporating my favourite technique!
1. Flirtatious Suite: I know I just used the Delicate Doily set last week to make a Thank You card, but it just doesn't get any more 'girly' than that set and the coordinating paper - Flirtatious. If you're looking for a really fun feminine card, and you're not afraid of bright colours, this is the paper and stamp set for you ;)

2. Rock 'n' Roll: Once of my favourite techniques, even though it's an oldie, is the "Rock N Roll" tehcnique. And it's almost as if the Delicate Doily set was MADE for rockin'! First, stamp your image in a lighter coloured ink (in this case, I chose Melon Mambo), then, 'roll' your stamp in the darker coloured ink (I used Wisteria Wonder). The edges of your stamp will pick up the new colour, and the middle will retain the first. I used this technique on the doily, and then punched it out using the Doily Triple Layer punch.

The supplies I used for this card were:
Cardstock: Daffodil Delight, Melon Mambo, Whisper White
Paper: Flirtatious DSP
Stamps: Delicate Doilies, Delightful Dozen
Ink: Wisteria Wonder, Melon Mambo
Embellishments: Wisteria Wonder Ruffled Ribbon
Tools: Fancy Flower punch, Doily Triple Layer punch

Maybe I'll put the Delicate Doilies away for a bit... But it will be hard!

Thank you for visiting! Until next time, happy stamping :)

-Tara

Wednesday, November 9, 2011

Sending Many Thanks

A "Thank You" card is one of my favourite kind of cards to make. Generally speaking, I find people to be very grateful (at least the ones in my life!), and a 'thank you' is always verbally exchanged for any gifts, gestures or help that's given - but the written thank you is less common. At least the non-electronic ones anyway. This, of course, is excluding wedding and shower thank you notes, which I still always  receive in the mail :)

This week's Friday Mashup was all about gratitude.
1. Make a project featuring "Heat Embossing"
2. Make a "Thank you" project
3. Mash it up and create a Thank You project using heat embossing

I chose to simply create a thank you project, sans heat embossing ;)

Sending Many Thanks

(FM31)


For this card, I wanted to make it fun and easy-going!
1. Make your own Designer Series Paper! I used the Delicate Doilies stamp set and three different colour inks to create a patterned paper that I could use with the colours I knew I wanted for the background and ribbon. Stampin' Up! does an excellent job of coordinating papers, inks and stamp sets, but sometimes it's fun to create your own combinations that fit your personal style!

2. Make it messy! Who says you need clean lines and crisp paper? ;) Rip, tear, moisten, and crumple a piece of DSP to add texture, visual interest, and depth to your card! It makes the card a little more playful and spontaneous!

The supplies I used for this card were:
Cardstock: Melon Mambo, Whisper White
Paper: More Mustard DSP
Stamps: Delicate Doilies, Petite Pairs
Ink: Island Indigo, Melon Mambo, More Mustard
Embellishments: Island Indigo Ruffled Ribbon
Tools: Postage Stamp punch, Sandy Speckles wheel


Until next time, happy stamping! :)

Sunday, November 6, 2011

For you, baby!

This was one of those cards that doesn't have a planned recipient - however, I know that it's only a matter of time :)

This week's colours at the Play Date Cafe challenge were so sweet: grey, pink, yellow. They screamed baby card! Unfortunately, the photo didn't pick up the Pirouette Pink all that well.


Welcome, Baby
(PDCC106)

For this card, I wanted to keep it soft and curvy
1. Make your own edge border! I wanted to have a big, chubby scalloped border for this card to mimic the shape of the birdcage. I punched out the Fancy Flower punch from Pink Pirouette and snipped off the petals to make the border.

2. Cut it out! Add some dimension and depth by stamping an image directly onto the card base, and then cutting out another stamped image to pop up on dimensionals.

The supplies I used for this card were:
Cardstock: Whisper White, Basic Gray, Pink Pirouette, So Saffron
Stamps: Aviary, Petite Pairs
Ink: Pink Pirouette, Whisper White (craft) 
Embellishments: 5/8" Whisper White Satin Ribbon 
Tools: Fancy Flower punch, Large Scallop oval punch, Large Oval punch, 3/16" Corner punch

Happy Sunday, everyone - Until next time, happy stamping :)

-Tara

Here for you

This week for Pals Paper Arts challenge, I kept it simple again! I love monochromatic cards - and I especially love them when they are brown.

One of the many things I love about Stampin' Up! is how easy it is to coordinate. While still maintaining creative license, you can create a seamless, congruent card thanks to their endless attention to detail.

I needed a clean, simple, masculine card for someone who is going through a hard time.

I'm Here For You

(PPA118)

For this card, I needed to to be sincere and masculine.
1. It's all in the colour! Looking for masculine Designer Series Paper? Look no further than the Well Worn series. I adore this paper for a vintage look, or for masculine cards. It's earthy tones makes it perfect for a natural, neutral card.

2. Frame it! For this card, I used the Decorative Label punch as a frame. Although it wasn't framing anything in particular, it really draws your eye to the DSP and doesn't distract from the sentiment. 

The supplies I used for this card were:
Cardstock: River Rock (108640),  Soft Suede (115318),
Paper: Well Worn Designer Series Paper (122359)
Stamps: Petite Pairs (W122495, C122497)
Ink: Early Espresso (119670)
Tools: Decorative Label punch (120907), 3/16" Corner punch (119871), Dimensionals (104430)

Hope to see you soon - Until next time, happy stamping :)

-Tara

Labels

*Monthly Class* (1) *Project Life* (2) *Undefined Kit* (3) 2013-2014 Catty Sneak Peek Week (5) 2014 Occasions Sneak Peek Week (8) 2014-2015 Catty Sneak Peek Week (2) Artisan Award Finalists Blog Hop (10) Blog Candy (15) Catalogue: 2013-2014 (2) Catalogue: Holiday 2012-2013 (2) Catalogue: Holiday 2014 (2) Catalogue: Occasions 2014 (4) Catalogue: Occasions Mini 2012 (1) Catalogue: Spring 2013 (3) Challenge: Cas-ual Friday (2) Challenge: CASE Study (3) Challenge: Color Throwdown (3) Challenge: Colour Me (71) Challenge: ColourQ (12) Challenge: Create with Connie and Mary (1) Challenge: Creative Scrappers (3) Challenge: Dynamic Duos (36) Challenge: Fab Friday (3) Challenge: Freshly Made Sketches (37) Challenge: Friday Mashup (156) Challenge: Just Us Girls (1) Challenge: MDS Monday (70) Challenge: Merry Monday (4) Challenge: Mojo Monday (1) Challenge: Pals Paper Arts (7) Challenge: Play Date Cafe (10) Challenge: Retro Sketches (12) Challenge: Sunday Stamps (44) Challenge: Technique Time Tuesday (1) Challenge: The Paper Players (2) Challenge: Tiddly Ink (2) Challenge: Tis the Season (5) Charity (1) Colour Me (1) Craft Project Central (48) Die: Autumn Accents (4) Die: Mama Elephant (2) Die: Memory Box (2) Die: Simon Says (1) Die: Stampin' Up! (1) Die: Taylored Expressions (1) Die: Top Note (6) Die: Two Tags (1) Digital Scrapbooking Day (1) Edgelits: Adorning Accents (5) Embellishment: SimonSays (1) Embosslit: Fashionable Hearts (8) Embosslit: Little Pieces (1) Fabric: Flirtatious (2) Fabric: Summer Smooches (1) Framelits: Basic Set (1) Framelits: Bitty Banners (4) Framelits: Chalk Talk (7) Framelits: Curvy Keepsake Box (1) Framelits: Feathers (2) Framelits: Holiday (2) Framelits: Label (1) Framelits: Labels (16) Framelits: Landscape Trio (1) Framelits: Mustache (1) Framelits: On Film (1) Framelits: Ovals (10) Framelits: Stars (2) Framelits: Window (3) Framelits: Word Bubbles (1) Holiday Catalogue Sneak Peek Week (6) Kit: Boutique Boxes (1) Marker: Blendability (1) Marker: Copic (20) MDS (My Digital Studio) (107) MDS (My Digital Studio): Digital Tuesdays (3) MDS (My Digital Studio): TGIT (21) My Paper Pumpkin (2) Paper: American Crafts (1) Paper: Basic Grey (2) Paper: Bazzill (1) Paper: Bella Blvd (1) Paper: BoBunny (3) Paper: Crate Paper (1) Paper: Echo Park (1) Paper: Graphic 45 (1) Paper: Kaiser Crafts (1) Paper: My Minds Eye (1) Paper: Neenah (1) Paper: Penny Black (1) Paper: Stampin' Up! (10) Punch: 1 Circle (7) Punch: 1 Square (1) Punch: 1-1/4 Square (5) Punch: 1-3/4 Circle (8) Punch: 1-3/8 Circle (24) Punch: 1/2 Circle (18) Punch: 2 Circle (6) Punch: 2-1/2 Circle (10) Punch: 3/4 Circle (10) Punch: 3/8 circle (2) Punch: 7/8 Scallop (1) Punch: Banner (1) Punch: Bird Builder (1) Punch: Blossom (9) Punch: Boho Blossoms (7) Punch: Butterfly (5) Punch: Chevron (4) Punch: Corner (16) Punch: Cupcake (7) Punch: Curly Label (3) Punch: Decorative Label (22) Punch: Doily Triple Layer (2) Punch: Dotted Scallop Border (24) Punch: Elegant Butterfly (8) Punch: Fancy Flower (15) Punch: Hexagon (2) Punch: Itty Bitty (2) Punch: Itty Bitty Accents (1) Punch: Jewelry Tag (8) Punch: Large Oval (13) Punch: Mini Curly Label (1) Punch: Mosaic (2) Punch: Oval (1) Punch: Petite Pennants (2) Punch: Petite Petals (3) Punch: Postage Stamp (10) Punch: Scallop Circle (20) Punch: Scallop Oval (9) Punch: Scalloped Tag Topper (2) Punch: Small Heart (5) Punch: Small Oval (1) Punch: Spiral Border (1) Punch: Star (1) Punch: Ticket Corner (1) Punch: Ticket Duo (1) Punch: Word Window (3) SAB13 (3) SAB13: Feeling Sentimental (2) SAB13: Lemonade Stand (1) SAB13: Mini Curly Label (2) SAB13: Ribbon/Button pack (1) SAB13: Sycamore Street DSP (1) SAB13: Vintage Verses (1) SAB14 (2) scrapbook (2) Show & Tell (1) Sizzlet: Lots of Tags (1) Sizzlit: Floral Fusion (2) Sizzlit: Little Leaves (5) Sizzlit: Pinwheel (1) Spring Catalogue Sneak Peek Week (5) Stamp: Elements of Style (4) Stamp: 2CuteInk (2) Stamp: All in the family (1) Stamp: And Many More (3) Stamp: Apothecary art (4) Stamp: Aviary (4) Stamp: Baby We've Grown (2) Stamp: Best Dad Ever (3) Stamp: Best of Birthdays (1) Stamp: Best of Flowers (1) Stamp: Best of Love (5) Stamp: Blended Bloom (1) Stamp: Blooming with Kindness (9) Stamp: BoBunny (1) Stamp: Bold Snowflake (1) Stamp: Bootiful Occasions (5) Stamp: Boys will be Boys (1) Stamp: Bright Blossoms (3) Stamp: Bring on the Cake (9) Stamp: By The Tide (7) Stamp: CantStamptheRain (1) Stamp: Carry On (2) Stamp: Celebrate Baby (2) Stamp: Chalk Talk (3) Stamp: Chevron (4) Stamp: Christmas Bauble (1) Stamp: Clearly Besotted (1) Stamp: Clockworks (4) Stamp: Collage Curious (1) Stamp: Cool Kid (2) Stamp: Countryside (1) Stamp: Crazy Mixed-Up Love (4) Stamp: Cupcake Party (1) Stamp: Curly Cute (5) Stamp: Cycle Celebration (1) Stamp: Delicate Doilies (7) Stamp: Delightful Dozen (14) Stamp: Dictionary (2) Stamp: Draw the Line (1) Stamp: Elementary Elegance (2) Stamp: Elements of Style (7) Stamp: En Francais (5) Stamp: Fabulous Florets (1) Stamp: Fine Feathers (4) Stamp: Fine Flourish (1) Stamp: Flock together (2) Stamp: For the Birds (12) Stamp: Forever in Time (1) Stamp: Four Feathers (2) Stamp: Four Seasons (3) Stamp: French Foliage (2) Stamp: Fresh Vintage (4) Stamp: Friendly Phrases (5) Stamp: Funky Four (3) Stamp: Gnome Sweet Gnome (2) Stamp: Gnomenclature (1) Stamp: Googly Ghouls (2) Stamp: Gorgeous Grunge (7) Stamp: Greetings of the Season (1) Stamp: Happiest Birthday Wishes (1) Stamp: Happiness Shared (3) Stamp: Happy Day (5) Stamp: Happy Hour (2) Stamp: Happy Watercolor (3) Stamp: Happy You (1) Stamp: Hardwood (5) Stamp: Have a Seat (1) Stamp: Hello Love (1) Stamp: Holiday Home (1) Stamp: I Dig You (4) Stamp: Itty Bitty Banners (4) Stamp: Itty Bitty's (1) Stamp: Just Saying (2) Stamp: Kinda Eclectic (4) Stamp: Kindness Matters (4) Stamp: Language of Friendship (2) Stamp: Lawn Fawn (6) Stamp: Life Shared (1) Stamp: Lily Bee Designs (1) Stamp: Little Buddy Birthday (1) Stamp: Love and Sympathy (1) Stamp: Love You to the Moon (2) Stamp: Lovely as a Tree (4) Stamp: Magnificent Maple (2) Stamp: Make a Cake (1) Stamp: Make It Crafty (2) Stamp: Marianne Design (1) Stamp: Mixed Bunch (4) Stamp: More Merry Messages (5) Stamp: Moving Forward (3) Stamp: My Favorite Things (2) Stamp: Notable Alphabet (2) Stamp: Off the Grid (6) Stamp: Oh Hello (5) Stamp: Oh Whale (2) Stamp: Open Sleigh (2) Stamp: Outlined Occasions (3) Stamp: Owl Occasions (1) Stamp: Paper Pumpkin (1) Stamp: Paper Smooches (2) Stamp: Papillon Potpourri (4) Stamp: Peachy Keen (1) Stamp: Penny Black (3) Stamp: Perfect Blend (3) Stamp: Perfect Peacock (2) Stamp: Petite Pairs (19) Stamp: Petite Petals (2) Stamp: Pleasant Poppies (3) Stamp: Point & Click (1) Stamp: Point and Click (1) Stamp: Postage Collection (1) Stamp: Punch Pals (2) Stamp: Really Good Greetings (3) Stamp: Reasons to Smile (2) Stamp: Regarding Dahlias (4) Stamp: Santa Stache (2) Stamp: Santoro (1) Stamp: Scentsational Season (2) Stamp: Serene Silhouettes (4) Stamp: Short and Sweet (5) Stamp: Simon Says (2) Stamp: Simon Says Stamp (1) Stamp: simonsaysstamp (1) Stamp: Simply Sketched (5) Stamp: Simply Stars (5) Stamp: Snow Swirled (3) Stamp: Some Odd Girl (1) Stamp: Special Season (1) Stamp: Stampin' Up! (15) Stamp: Stippled Blossoms (6) Stamp: Storybook Friends (3) Stamp: Sunshine (2) Stamp: Swallowtail (1) Stamp: Sweet Cake (2) Stamp: Sweet Essentials (2) Stamp: Tap Tap Tap (2) Stamp: Teeny Tiny Wishes (29) Stamp: That's the Ticket (1) Stamp: The Newborn King (1) Stamp: Tiddly Inks (10) Stamp: Tim Holtz (1) Stamp: Timeless Talk (5) Stamp: Tiny Tags (6) Stamp: Today & Everyday (1) Stamp: Toxic Treats (1) Stamp: Triple Treat Flower (2) Stamp: Truly Grateful (1) Stamp: Two-by-Two (1) Stamp: Up Up and Away (6) Stamp: Watercolour Winter (1) Stamp: Wetlands (4) Stamp: White Christmas (1) Stamp: Wild Rose Studios (1) Stamp: Wildflower Meadows (2) Stamp: Winter Memories (4) Stamp: Winter Post (1) Stamp: Winter Wonderland (1) Stamp: Wintertime (1) Stamp: Wonderfall (1) Stamp: Word Play (6) Stamp: World Treasures (1) Stamp: Wplus9 (3) Stamp: You Rock (3) Stamp: You're My Hero (2) Stamp: You're My Type (1) Stamp: Your Next Stamp (4) Stamp: Zoo Babies (2) Stamp: Zoo Review (1) Technique: 2-1/2; Circle Punch (1) Technique: 3D Project (12) Technique: Blossom Punch (1) Technique: Box in a Bag (1) Technique: Brick (1) Technique: Brickwall (1) Technique: Bushes (1) Technique: CAS (3) Technique: Chevrons (1) Technique: Clear Block Stamping (2) Technique: Clouds (2) Technique: Colour Blocking (1) Technique: Coloured Embossing (1) Technique: Coloured Rhinestones (1) Technique: Coloured Ribbon (1) Technique: Decorative Label Punch (1) Technique: Delft Tile (1) Technique: DIY Embossing (1) Technique: Easel (3) Technique: Embedded Image (1) Technique: Emboss Resist (1) Technique: Fancy Flower punch (5) Technique: Faux Layer (1) Technique: Faux Stitching (11) Technique: Faux Suede (2) Technique: Flip Card (1) Technique: Heat Embossing (25) Technique: Herringbone (1) Technique: Ink Blowing (1) Technique: Iris Fold (2) Technique: Joy Fold Card (1) Technique: Masking (3) Technique: Outside the box (1) Technique: Paper Lantern (1) Technique: Paper Piecing (5) Technique: Paper Piercing (1) Technique: Pleats (1) Technique: Punch Art (6) Technique: Quilling (1) Technique: Quilted Card (2) Technique: Rock N Roll (1) Technique: Rolled Paper Flowers (2) Technique: Rosette (3) Technique: Scattered Embossing (1) Technique: Shaker Card (4) Technique: Side-Step Card (2) Technique: Splatter (1) Technique: Sponged Stamp (1) Technique: Spotlighting (1) Technique: Stained Glass (3) Technique: Starburst (4) Technique: Stitching (1) Technique: Triple Time Stampiing (1) Technique: Twisted Easel (1) Technique: Versamark Resist *Ghosting* (1) Technique: Vintage (3) Technique: Washi Tape (1) Technique: Watercolour (3) Technique: Watermark (1) Thinlits: Little Letters (1) Tool: Alphabet Press EF (2) Tool: Aqua Painter (1) Tool: Argyle EF (8) Tool: Arrows EF (1) Tool: Blendabilities (7) Tool: Blender Pen (5) Tool: Brayer (3) Tool: Chevron EF (9) Tool: Cloudy Day EF (6) Tool: Colour Spritzer (3) Tool: Darice (1) Tool: Decorative Dots EF (1) Tool: Distressing (1) Tool: Elegant Lines EF (5) Tool: Envelope Punch Board (2) Tool: Essentials Paper Piercing Pack (1) Tool: Finial Press EF (1) Tool: Framed Tulip EF (1) Tool: Gift Box Punch Board (1) Tool: Honeycomb EF (3) Tool: Lucky Stars EF (1) Tool: Modern Mosaic EF (2) Tool: Needlepoint Border EF (1) Tool: Northern Flurry EF (2) Tool: Occasions Paper Piercing Pack (2) Tool: Paper Piercer (3) Tool: Perfect Polka Dots EF (19) Tool: Perforating Rotary Blade (1) Tool: Polka Dot Mask (1) Tool: Sanding Block (3) Tool: Simply Scored (2) Tool: Stripes EF (6) Tool: Stripes Stencil (1) Tool: Stylish Stripes EF (2) Tool: Woodgrain EF (9) Tools: Aqua Painters (1) Wrap it: Tag a Bag (1)